Weekend Project: Marshmallow Guns
One of the most enjoyable toys I can put together for a kid is a PVC marshmallow shooter. Honestly adults have a ton of fun with these things too! I debated about whether or not to put this post up, given the tragic events in CT a week ago, but decided most people who know me and read this blog would know that these toys promote wholesome family fun and good memories. These shooters would also make a great last minute Christmas present.
Years ago my friend Doug gave me my first marshmallow gun. I have made at least a hundred of them since then. I’ve made big batches for church events and this year my wife had me make 16 shooters – 6 for gifts and 10 for a big family marshmallow fight that we will be having when her family arrives from out of state. Let’s get to the project…
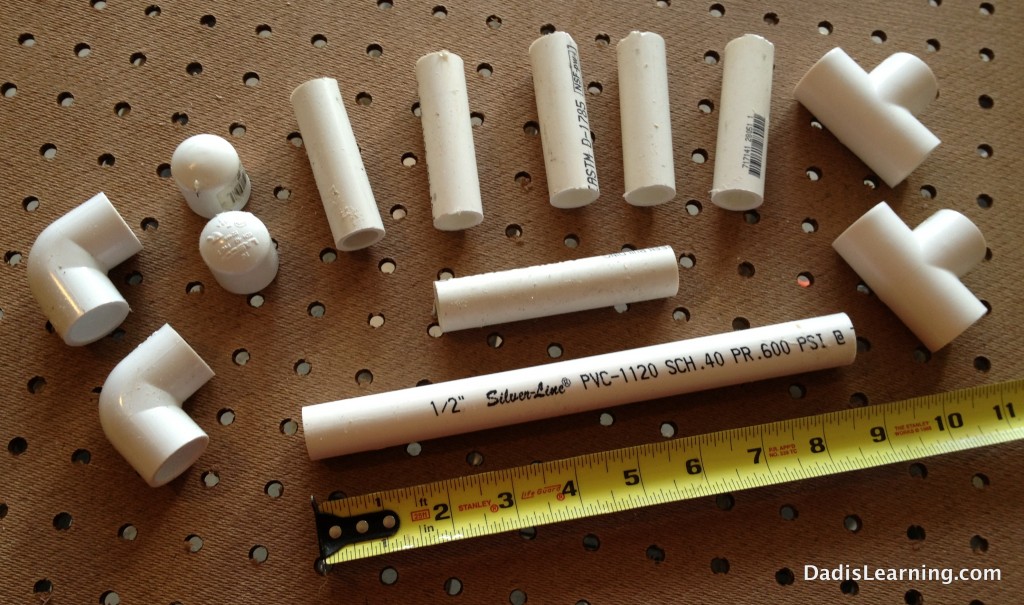
You will need at least one 10′ length of 1/2″ PVC pipe from the plumbing section at your local hardware store. Make sure it is” schedule 40.” There is another kind of PVC that is tan/grey in color that you do not want to use. A 10ft length of pipe costs around $2 and will make about 4 marshmallow guns if you cut and measure carefully. (Handy tip: Bring a pair of PVC cutters to
the store so you can cut the 10ft pipe out by your car and slide it in your vehicle easily.) While you are in the plumbing section, pick up (2) 90 degree elbows, (2) T’s and (2) caps for each shooter you plan to make. Make sure that all of those fittings DO NOT have threads in them. Many times the parts are jumbled and you might accidentally get one that is threaded. Lowe’s has bags of the elbows, T’s and caps. There are 10 in a bag and they run $2 to $3 a bag.
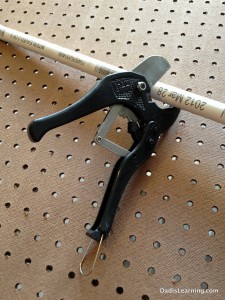
If you plan on making several of these guns, do yourself a favor and pick up a pair of ratcheting PVC cutters. They run about $10.
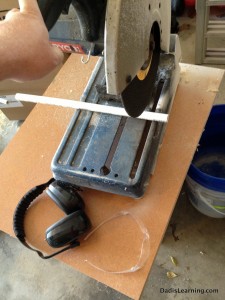
Now the fun begins. Mark out (5) 3″ lengths of PVC pipe, (1) 4″ length and (1) 9″ length for the barrel. The ratcheting PVC cutters will get the job done, but for big jobs you might want something bigger. I use a chop saw with an abrasive wheel to cut the guns quickly. Obviously you have to be super careful with a big saw and I would recommend wearing ear, eye and breathing protection. I
think the breathing protection (a basic mask) is a MUST because the fine PVC dust goes everywhere. Cut outside if you can.
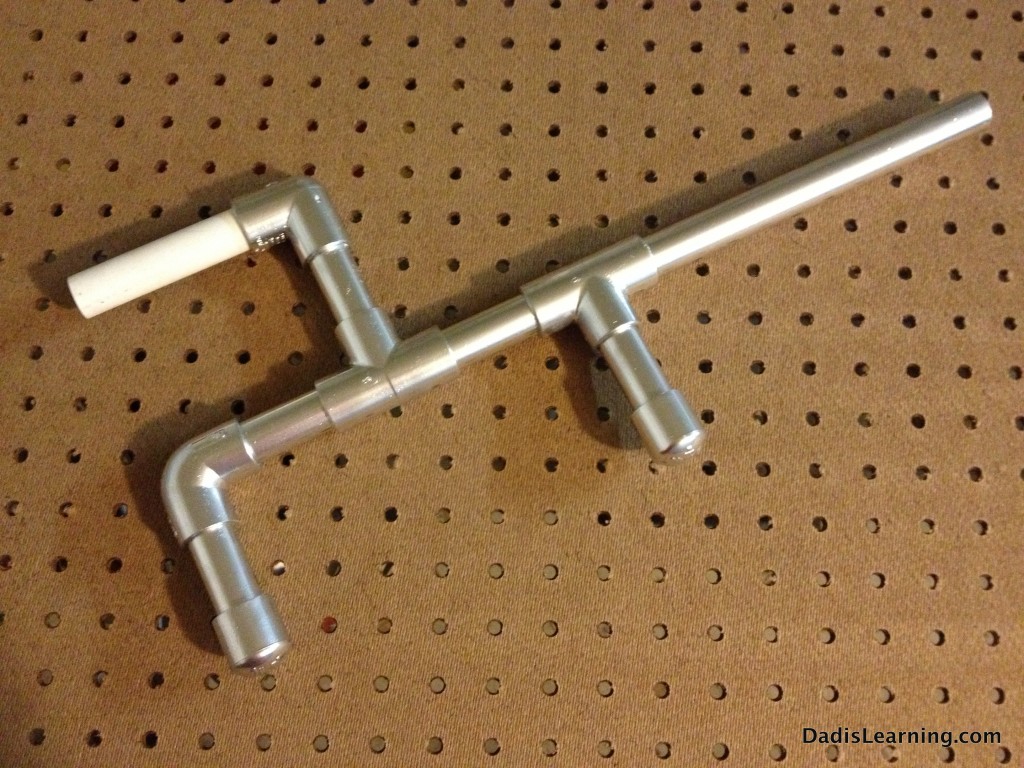
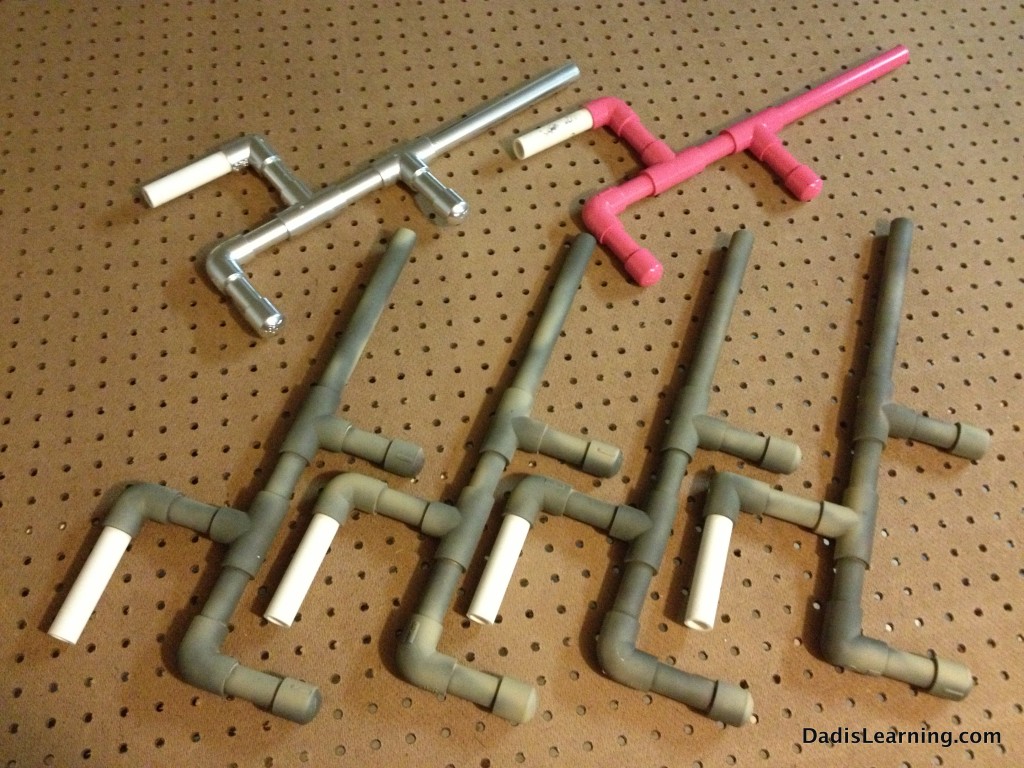
Once all your cuts are made, sand off any burs or rough cuts on the ends of your pieces. Any rough edges or burs that are on the inside edge of the pipe will catch marshmallows as they fly by and cause a jam. This is also a good time to wipe down all of the PVC with rubbing alcohol or another basic cleaner to prep for paint. Use the photo below as a guide for assembling your marshmallow gun. The 4″ piece is the mouth piece and the 8-9″ piece is for the barrel. Make sure you DO NOT use glue of any kind to hold the gun together. You will need to be able to take it apart later to clear out any stuck marshmallows.
Before painting your marshmallow gun, make sure to remove the mouth piece and leave it at your work area. You do not want to put your mouth on a spray painted surface. (Note: I always wash
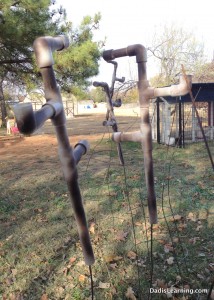
the mouth piece with warm water and soap before final assembly.) I have found that tomato cages turned upside down are a great way to hold the shooter up so you can paint it. You can also use a stick stuck in the ground, just anything that you can slide the barrel down onto and will hold the weight of the gun. Any standard spray paint will work on the guns. The paint that is made specifically for plastic is great but if you’re like me you probably don’t have any on hand. I like the camouflage colors that are made by Rust-oleum and the metallic colors as well. A spray paint can trigger handle is also handy to have for any painting project.
If the final color of your marshmallow gun is going to be a light color, it might be a good idea to paint over the bar codes and printing on the PVC pipe with some white paint. Have fun with different patterns and paint jobs. A coat of clear matte paint will help prevent chipping, but standard paint will chip off with use. Let the guns dry over night. Make sure to run water or pressurized air through the gun to blow out any loose PVC dust. You can also just blow it out with your mouth, just make sure not to inhale. Make sure to do this before you give it to a kid.
The finished product is fun for all ages. The marshmallow goes into the mouthpiece and is blown out with a strong puff of air. A BIG puff can make a pretty solid hit. For messy fun you can also lick the marshmallow before you put it in…they will stick to your target but will also leave some marshmallow residue. (I get in trouble for doing this before I shoot my wife.) Try to play away from your house or a populated area to avoid tracking in squished marshmallows on your shoes. Encourage children not to run with the shooter in or near their mouth. Have fun!!!
Have a great weekend and do something fun with your family!
If you liked this post, please share it on Facebook, Twitter or Pinterest. Subscribe to this blog via RSS or email for new posts.

Pingback: Paige's Party Ideas » Camo Party Ideas
Pingback: Father's Day Gift Ideas, 3 Things Dads REALLY Want My Kids' Adventures
I found your instructions for the marshmallow shooter on Pinterest. I am considering letting the boys and girls make them for our inteGRITy Camp this summer. From start to finsish, after adults cutting pieces, how long do you thinkn it would take kids to paint and assemble them? With a possible practice shooting day on the last day?
Sorry for the delay in reply. I’m not as active on here as I once was. I have done this activity on retreats, etc with the youth where we worship. The cutting will take most of the time. If you have someone with a chop saw it makes short work of all the cuts…and makes a huge mess. Putting the guns together takes 10-15 minutes, painting doesn’t take too long but you need to let it dry overnight before using. Make sure not to paint the mouth piece…I just leave it off when I’m painting. Hope that helps…