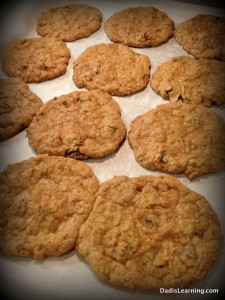
Favorite Things Friday: Power Cookies
The name of these cookies is a bit deceptive since they really give you no special powers, except the power to pack on pounds 
My Mom has been making these cookies since I was a kid. I can’t trace down the original source for the recipe, otherwise I would give credit where credit is due. I made these cookies with the five year-old this week for an event at church.
A quick lesson before we get to the recipe. We were having a youth event at church and I had asked members to sign up to bring cookies for the event. Our church is always so generous and the first time I looked at my list I already had people signed up to bring a total of 22 dozen cookies. This was a bit excessive. So, at our Sunday evening worship service I got up and politely told people we had too many cookies. That was my mistake. You can never have too many cookies! That’s what they make freezers and freezer bags for.
The good, polite people at our church heeded my instruction and graciously removed themselves from the list, leaving me with the 10 dozen cookies I was needing. However, as the event got closer I realized a good number of new faces were coming to our youth event and we would need more cookies. Lesson learned…never tell people you have too many cookies
We already had most of the ingredients on hand for the Power Cookies because it is a pretty basic recipe. I just had to go next door and steal a bar of shortening from my Mom. I enjoy cooking with my girls, so this was actually a fun excuse to work in some cooking time. This recipe is great because it makes 6-8 dozen cookies. We only needed 2 dozen or so for the night, so we were able to bake some to have at the house and then roll some up to freeze for fresh baked cookies anytime we want them.
Fire up your oven for 350 degrees. The cookies go together like any basic recipe. I used our stand mixer to make things easier because this is a pretty stiff recipe, but its also a good chance to work those forearm muscles if you’re using a spoon. Start by creaming together the 2 cups brown sugar, 2 cups granulated sugar, 3/4 cup (stick and a half) of softened butter, and 1 cup of shortening. Creaming things together is where a stand mixer really shines.
Once those ingredients are creamed together, add 4 eggs to the mix. The egg shells from our backyard chickens are a bit brittle, so I always crack the eggs into a separate bowl to make it easy to pick out bits of shell. Add 2 teaspoons of vanilla as well.
In a separate bowl, combine 3 cups of all-purpose flour, 2 teaspoons of salt (I use Kosher) and 2 teaspoons of baking soda. Once those dry ingredients have been whisked together, add them to the mixer. The motor for the stand mixer really starts digging in as the batter thickens up with these
ingredients. Make sure not to work the batter too much with the stand mixer.
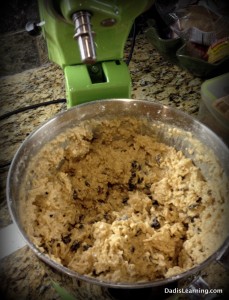
Now its time to add the fun ingredients – 3 cups of uncooked quick oats, 2 cups of shredded coconut (sweetened or unsweetened), 2 cups of raisins, 1 cup of chocolate chips and an optional 1 cup of chopped nuts. We have been using the semi-sweet chocolate chips from Trader Joe’s that are sweetened with cane sugar instead of high fructose corn syrup. Just a personal preference. Sometime I will try using the carob chips in this recipe.
If you’re using a spoon to stir, your forearm is going to be in beast mode by now. If you are using a stand mixer it is grinding away mixing up all those lovely ingredients. I can’t recommend eating cookie dough with raw egg in it, but this is some of the tastiest raw dough you will ever eat.
You have multiple options for how to proceed once the cookie dough is done:
- For best results, roll out ‘loaves’ of cookie dough in wax paper or parchment paper. Put the dough rolls into the fridge to chill for several hours. The roll can then be sliced and baked on a cookie pan lined with parchment paper. Cooking time can range from 15-18 minutes, until cookie start to brown nicely. Don’t over bake these cookies.
- Dough can also be scooped out by heaping teaspoons onto a parchment paper lined cookie pan. You could also use a greased cookie pan, but parchment paper makes for easier cleanup and a better cookie. Bake for 14-16 minutes, until cookie starts to nicely brown.
- A third option is to roll out the dough as mentioned in option 1. The rolled dough can be stored in the freezer, in a freezer bag, until needed.
Once removed from the oven, let cookies cool for a minute or so before removing to a cooling rack. After about 10-15 minutes, store cookies in an air tight container along with a slice of bread to keep them from getting dried out.
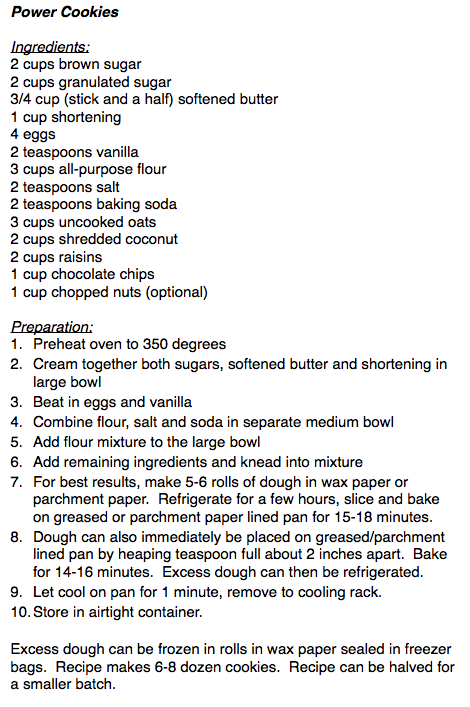
These cookies aren’t healthy by any stretch of the imagination, but they are a nice homemade treat. And pulling homemade dough out of the fridge or freezer is probably a better option than pulling out some manufactured dough. (Click the pic below to load a PDF of the recipe.)


